
Wiki
Collapse Wiki.
Rules, mechanics, crafting, vehicles, loot routes, danger zones, and support notes for The Collapse.
Recovery Vehicle Recovery Cone Recover the last vehicle you drove when it is close enough to the cone.
Overview
Driving around? Got stuck? I think we've all been there before... lol
Good thing is you can recover the vehicle yourself! (Hopefully)
How It Works
- The cone will look for the last car you were the driver of, it will then pull that car from its location, to right on top of the cone (if it is within 50m of the cone) .
- Make sure you walk away after you start the cone (you will hear beeping and even get a notification).
- ALL vehicles come with a free cone upon purchase. If you were to lose that cone, they are available at the Vehicle Parts vending machine for 1 ruble.
- If the cone does not work then # create-a-ticket 🙂
Vehicle Keys Vehicle Keys Garage-spawned keys are assigned when you pull vehicles out and removed when you park them.
How It Works
You do not need to buy a key when trying to use your vehicle.
When you pull a vehicle out, the garage will assign a key to it and place it on you. When you park a vehicle in the garage, it will take that same key.
You can also use that key to lock and unlock the vehicle while you are out looting.
Be sure to keep that key on you until the vehicle is parked again.
Key Drop Warning
There are random cases where the key drops to the ground at the meter. PLEASE double check before driving away.
Events Auto-Events Discord bot-run events with map-specific signups and one active entry per player.
How It Works
Auto-Events are Discord bot-run events. When an event goes live, the Auto-Event role will be pinged so players can review the event details.
If you want to participate, click the Count me in button on that server's event.
Only one entry is allowed. You cannot join Chernarus and Alteria simultaneously, so choose between the two.
Switching Maps
If you want to switch maps for the event, hit Remove my entry, then hit Count me in on the other server's event.
Switching Wipes Results
KEEP IN MIND THIS WILL WIPE YOUR RESULTS CLEAN.
First-Time Entry
The Count me in button will automatically accept you if you have participated before.
If not, you will be asked to hit Count me in again to provide your in-game name and SteamID.
Rule 2.11
ENSURE RULE 2.11 is being followed. IN-GAME NAME MUST MATCH DISCORD NICKNAME.
Crafting RaG BaseItems - Crafting Guide Quick recipes for crates, containers, utility items, decor, and materials.
Normal Crafting
Workbench Hammer Required
Crates
Storage / Containers
Utility
Decor / Misc
Other
Craft Bench Craft Bench Use the Craft Bench for supported upgrades and recipes, but empty item contents first.
Before You Craft
Any items you put into the Craft Bench need to have empty contents.
If an item has storage inside it, clear that storage before placing the item into the bench for crafting or upgrades.
Craft Bench Picture
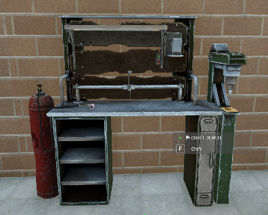
Base Building Bunker Base Building Build an underground-style tunnel base with a ground hatch and protected sky base space.
Want To Build A Bunker Base?
What Is A Bunker Base?
The Bunker Tunnels system lets you dig underground-style tunnel bases.
Your base is deployed extremely high in the sky.
- Your base does not render unless you enter it.
- Less world clutter.
- Reduced map load.
- Better overall server FPS.
You get a full custom base without hurting performance.
How It Works
- Place a hatch on the ground with a Bunker Shovel.
- Enter your tunnel system.
- Build freely inside your own space.
- Requires a FlagPole on the ground and in the base.
- Attach a CodeLock so your base is secure.
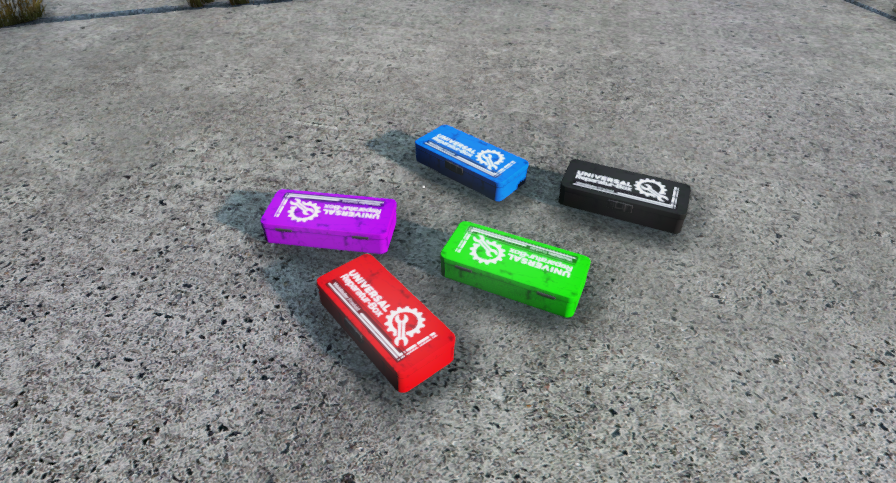
Repairs Collapse Repair Boxes Repair clothing and tools faster as you upgrade the box tier.
Repair Box Tiers
Collapse Repair Boxes repair gear faster as the tier goes up.
Upgrading
T1 boxes are found in the world. T2 and T3 boxes come from upgrading at the Craft Bench.
All repair box tiers can be sold at Advanced Trader.
Impound Vehicle Impound What happens when a vehicle is left out too long and how to get it back.
What Happened?
Out looting and now your car is gone?
We apologize, but your car was more than likely impounded.
Impound Rules
- If you are outside of 50m from your car for more than 2 hours, it will be impounded
- Don't worry, it goes to the last garage it was parked in
- It can be retrieved from any garage for a small fee
Why We Use It
We use this system to help so that cars aren't left out for hours on end. It also improves server FPS when less cars are out
Container Control Inventory Sort Mod Use stack, mass move, and clear buttons to clean up containers fast.
DayZ Inventory Guide: Stack, Move & Clear
Managing your inventory just got a whole lot easier. Use these three handy UI buttons to instantly sort, transfer, or empty your containers and clothing.
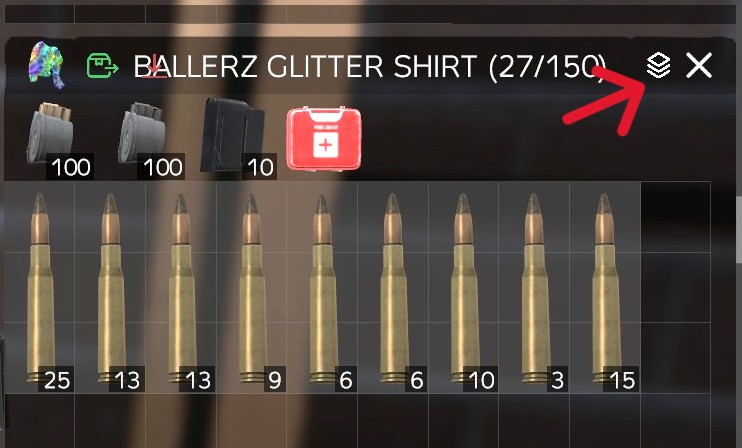
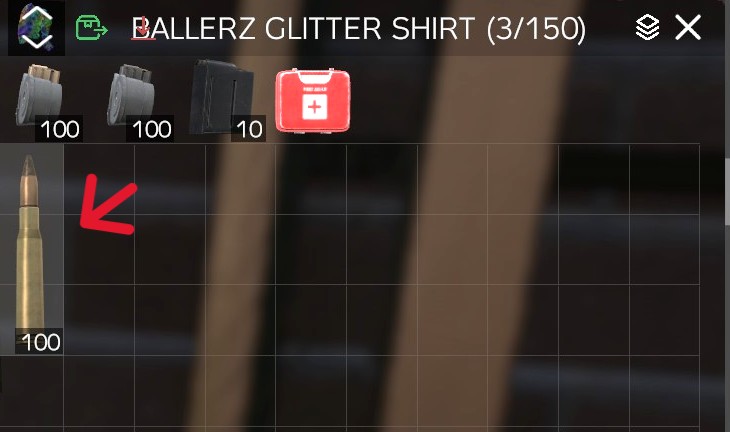
1. Stack & Sort Items
What it does: Instantly organizes the container's contents and automatically combines loose, stackable items like ammo or resources.
How to use: Click the Stacked Squares Icon in the top-right corner of the container window.
Example: Turning multiple loose piles of ammo into one neat, full stack to instantly free up slots.
2. Mass Move / Collect All
What it does: Transfers every single item from that specific container directly into your personal inventory, or the other way around if transferring into storage.
How to use: Click the Green Arrow Icon next to the container's name.
Example: Emptying a storage cabinet or looting clothing in a single click without dragging items one by one.
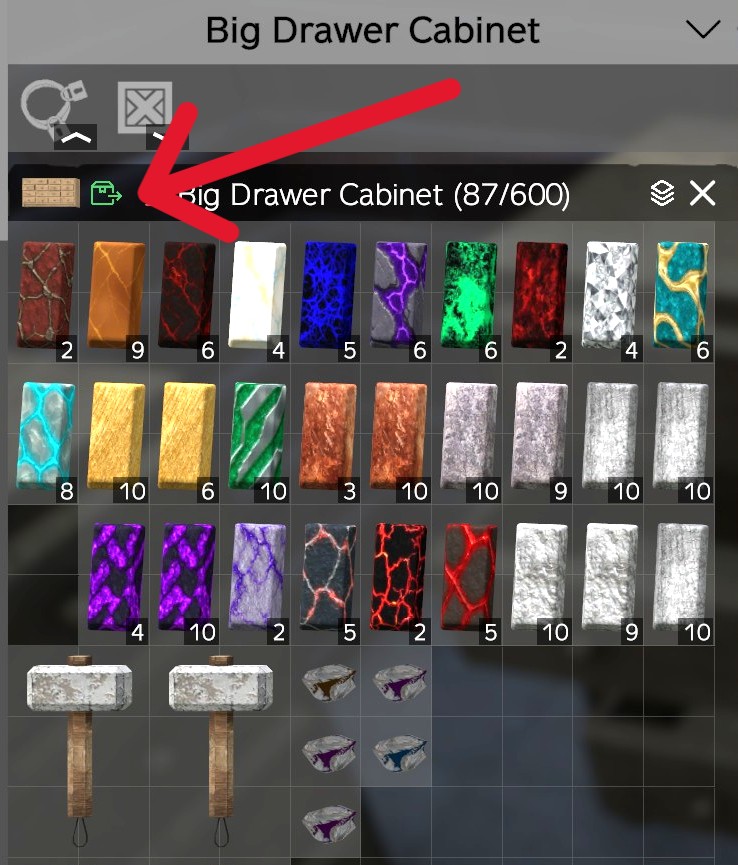
3. Mass Drop / Clear Inventory
What it does: Instantly drops everything inside that specific item's inventory directly onto the ground.
How to use: Click the Red Arrow Button next to the container name.
Example: Stripping down a piece of gear or quickly dumping loot on the floor for your squad to sort through.
Reloading Speed Loader Guide Load and unload magazines fast without the endless click-click-click.
Why Do You Need a Speed Loader?
Tired of spending forever reloading magazines?
Do you leave ammo in mags when selling guns because emptying them is a hassle?
The Speed Loader is one of the biggest quality-of-life items you can own!
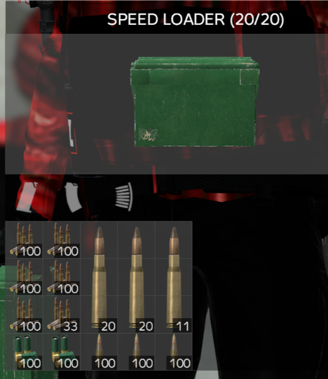
How It Works
- Store your most-used ammo inside the Speed Loader inventory.
- Place a magazine into the mag slot.
- Press one key to instantly load the magazine.
- Need to unload a mag? It works just as fast.
No more endless clicking. No more wasted time.
Upgrade Your Speed Loader
The standard Speed Loader found around the map can reload:
- 1 Magazine at a Time
Using your Craft Bench, you can upgrade it to hold:
- 2 Magazines at a Time
- 3 Magazines at a Time
Stop the Click-Click-Click
Don't waste time manually loading magazines when a Speed Loader can do it instantly.
Grab one today and spend more time surviving, looting, and fighting, not reloading.
Backpack Crafting BallerZ Backpack Upgrade Use the Craft Bench, required bars, a hacksaw, and your backpack to craft the 500-slot upgrade.
Step 1: Find a Craft Bench
Locate a Craft Bench, which can be found as a kit around the map.
Step 2: Select the Backpack Upgrade
Use the arrow controls on the Craft Bench menu to navigate to the Backpack Upgrades section.
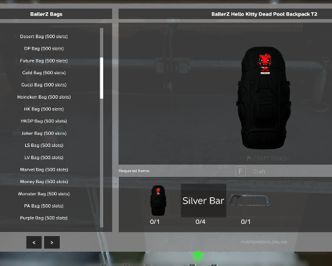
Step 3: Check Required Materials
Hover your mouse over the material bar shown in the recipe. This will display the specific type of bar required for the upgrade.
Bars can be obtained by:
- Looting Mining Crates around the map
- Mining ore and crafting bars using the mining system
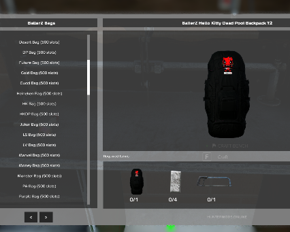
Step 4: Load the Craft Bench
Place the following items into the Craft Bench inventory:
- Your BallerZ Backpack
- A Hacksaw
- The required bars for your selected upgrade
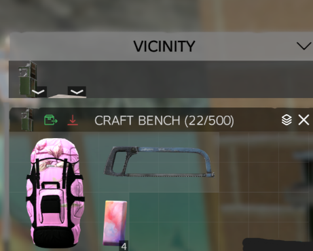
Important Warning
EMPTY YOUR BACKPACK BEFORE UPGRADING!
The original backpack is deleted during the crafting process and replaced with a new upgraded version. Any items left inside will be lost.
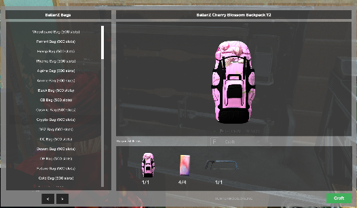
Step 5: Craft the Upgrade
Once all required items are in the Craft Bench:
- The CRAFT button will turn green
- Click CRAFT
- Wait a few seconds for the process to complete
Your new 500-slot BallerZ Backpack will be ready to use!
Drug Economy iM7s Drug Running Start here before jumping into materials, campers, and the full drug guide.
Overview
Want to understand how the drug system works before diving in?
This quick guide breaks down how the mod functions, what to expect, and how to get started.
Tip
Camp Events are a great source of Drug Materials!
Full Guide
Production Moonshining Guide Set up a still, prep mash pots, fire it up, and collect finished moonshine.
Overview
Ready to start your own moonshine operation? Follow these simple steps to turn basic ingredients into bottles of delicious moonshine.
Step 1: Set Up Your Still
Place your Moonshine Still in a safe location with enough room to work around it.
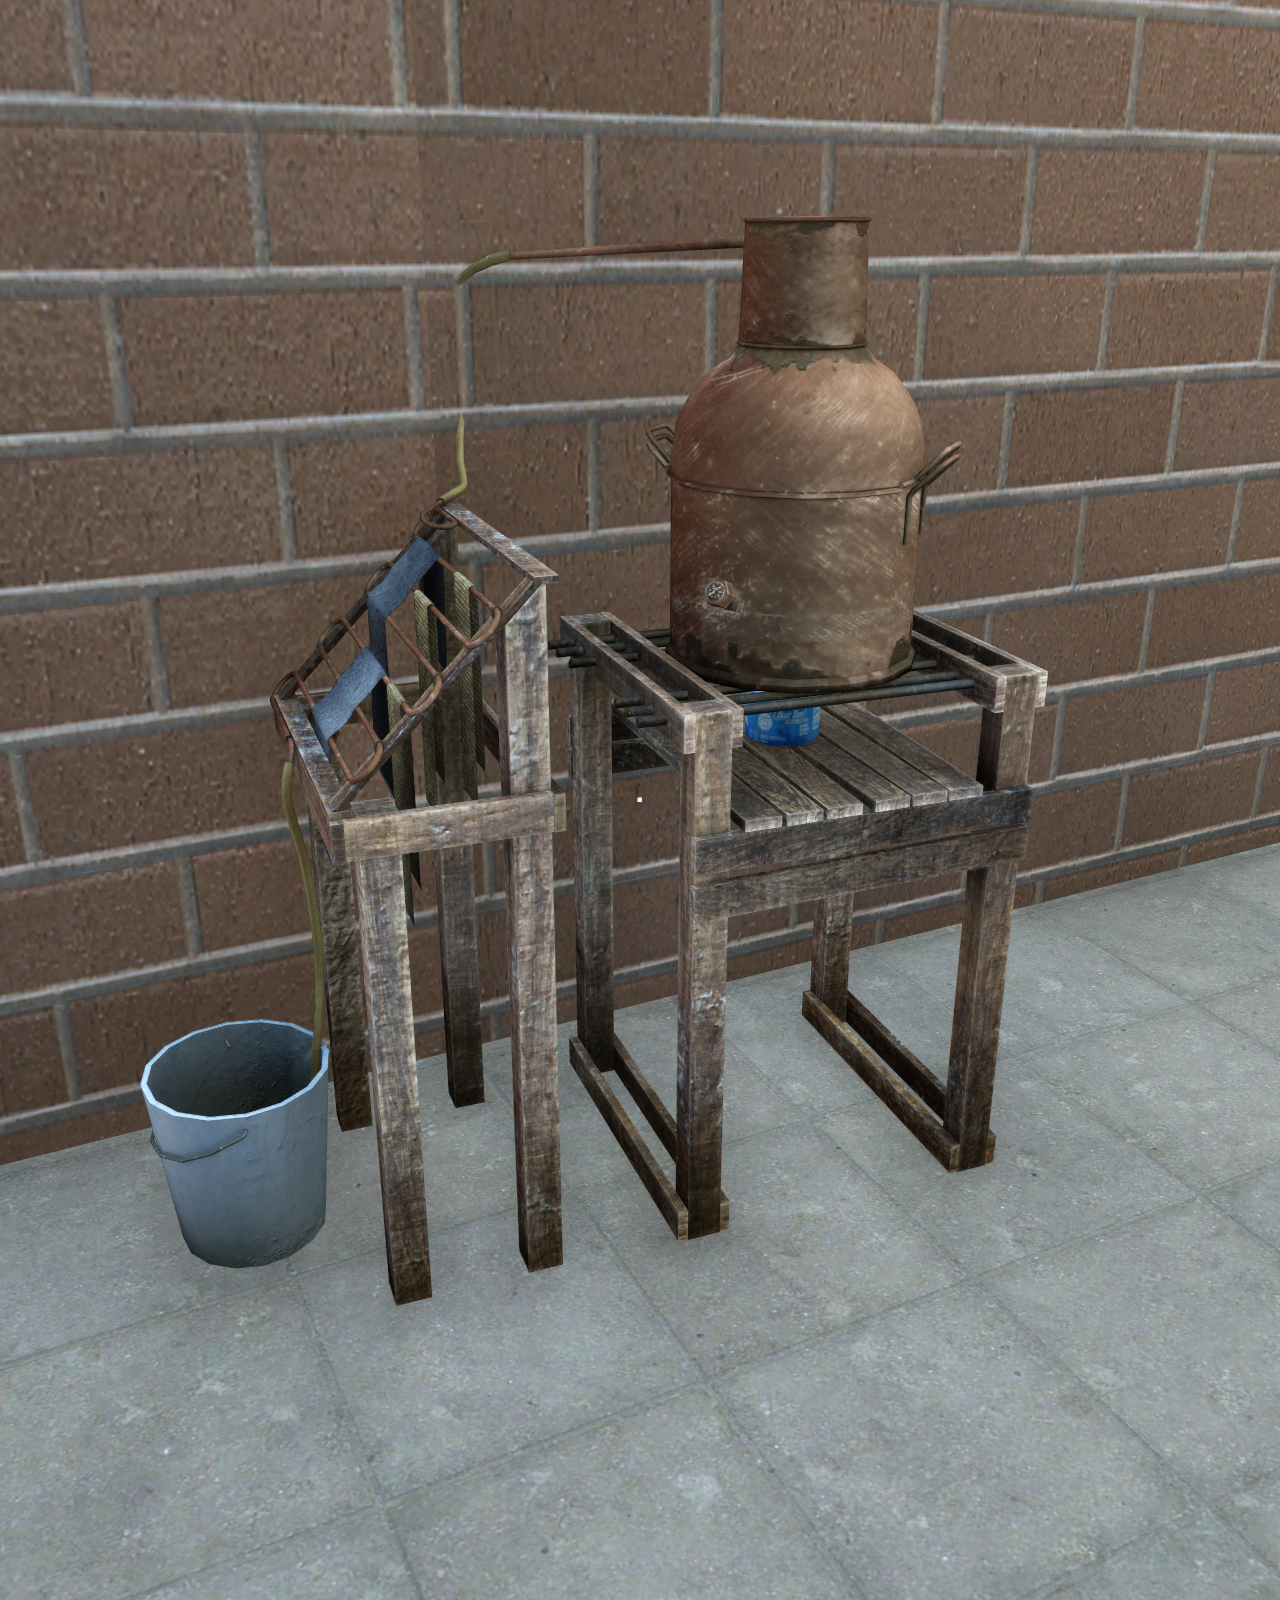
Step 2: Attach Fuel Components
Attach the following items to the still:
- Propane Canister
- Hose
Once both are attached, your still is ready for production.
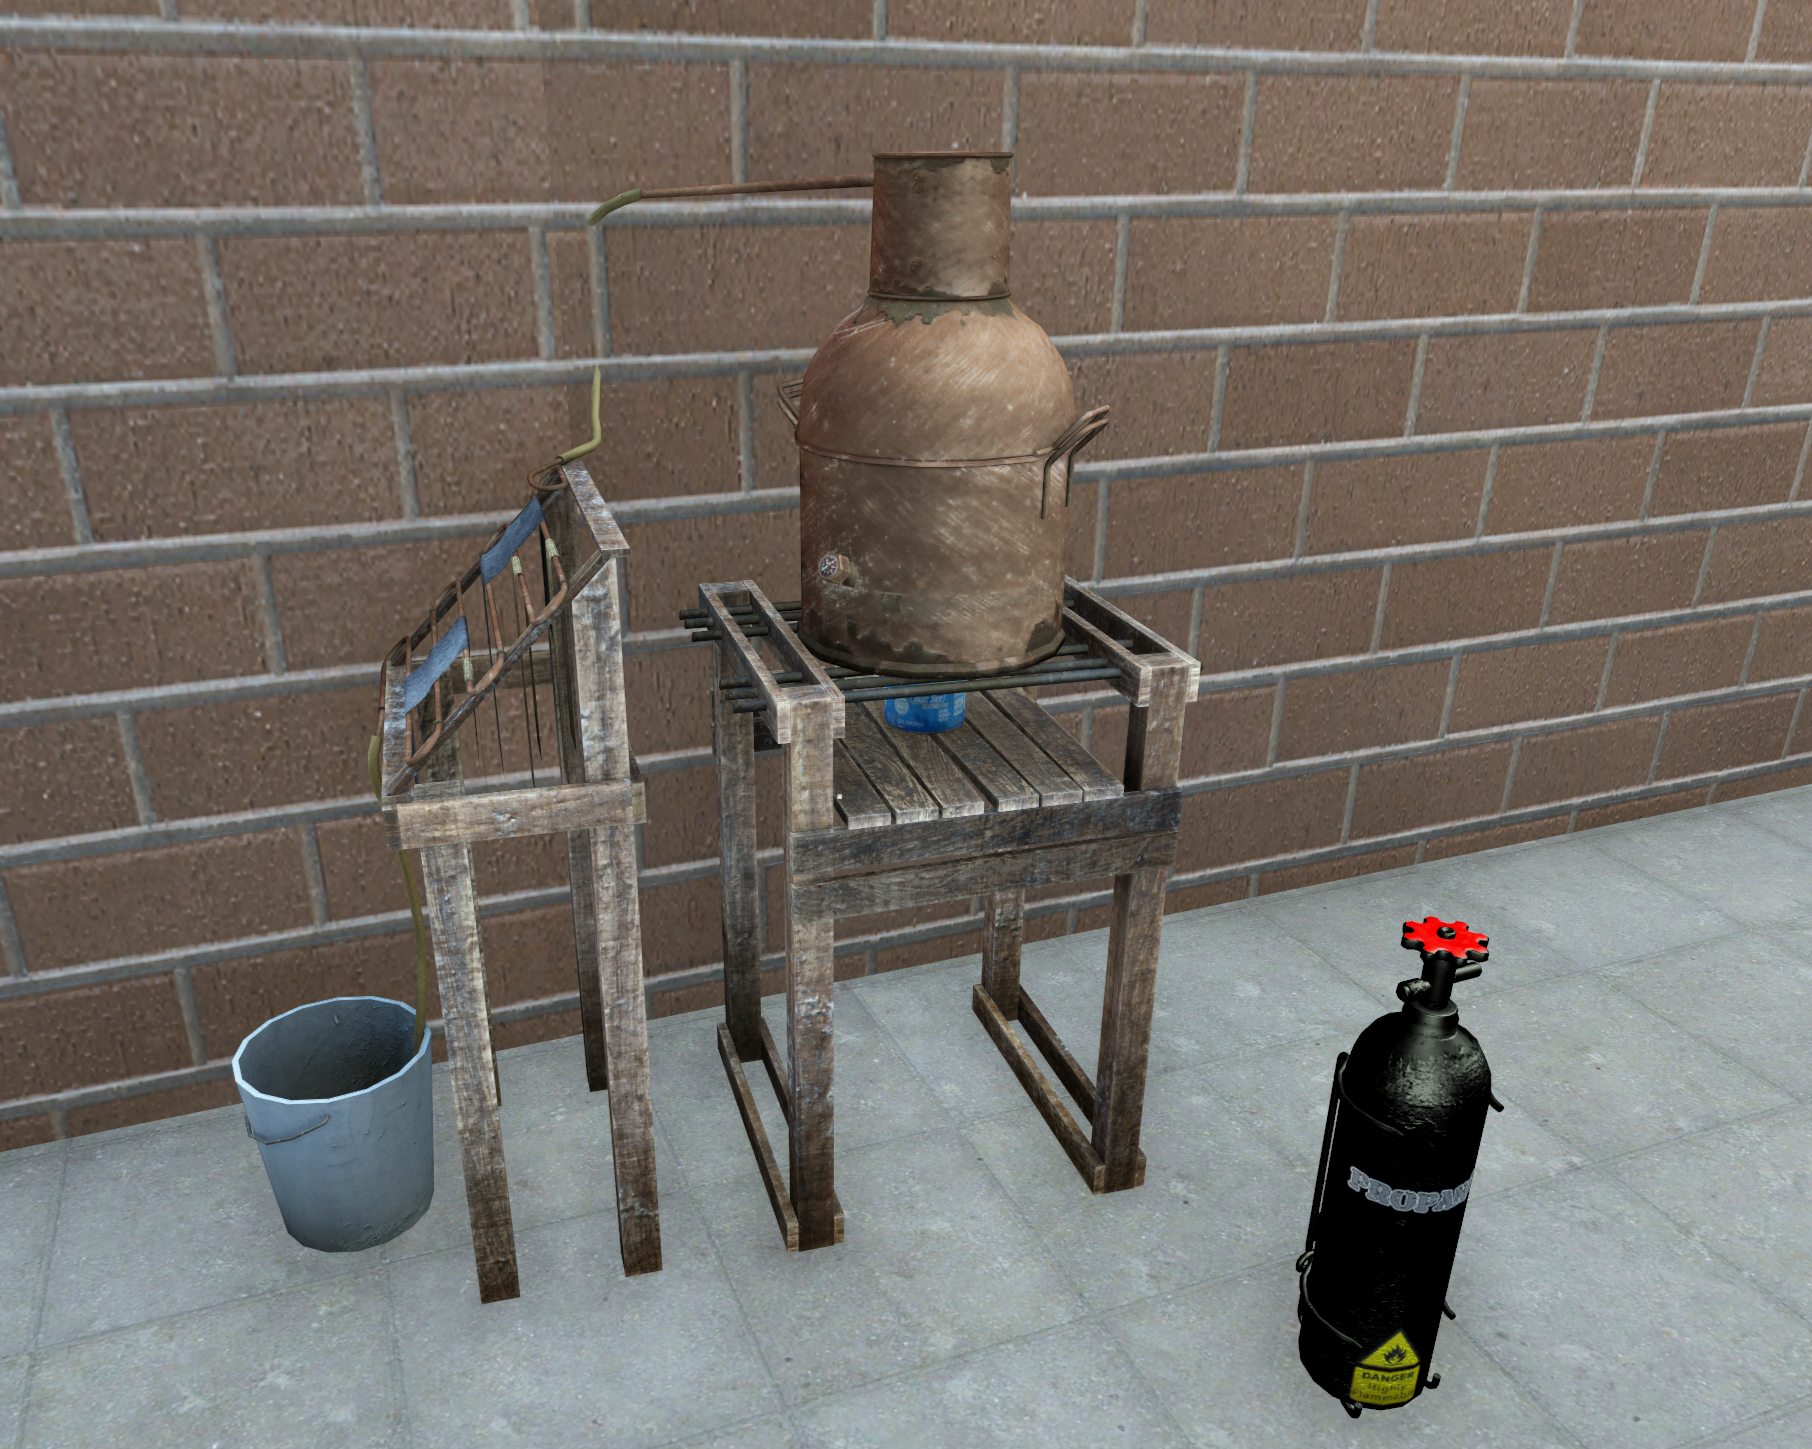
Step 3: Gather Ingredients
You'll need:
- Sugar
- Yeast
- 2 Cooking Pots
- Flavor ingredient of your choice, such as pumpkin slices, apples, or berries
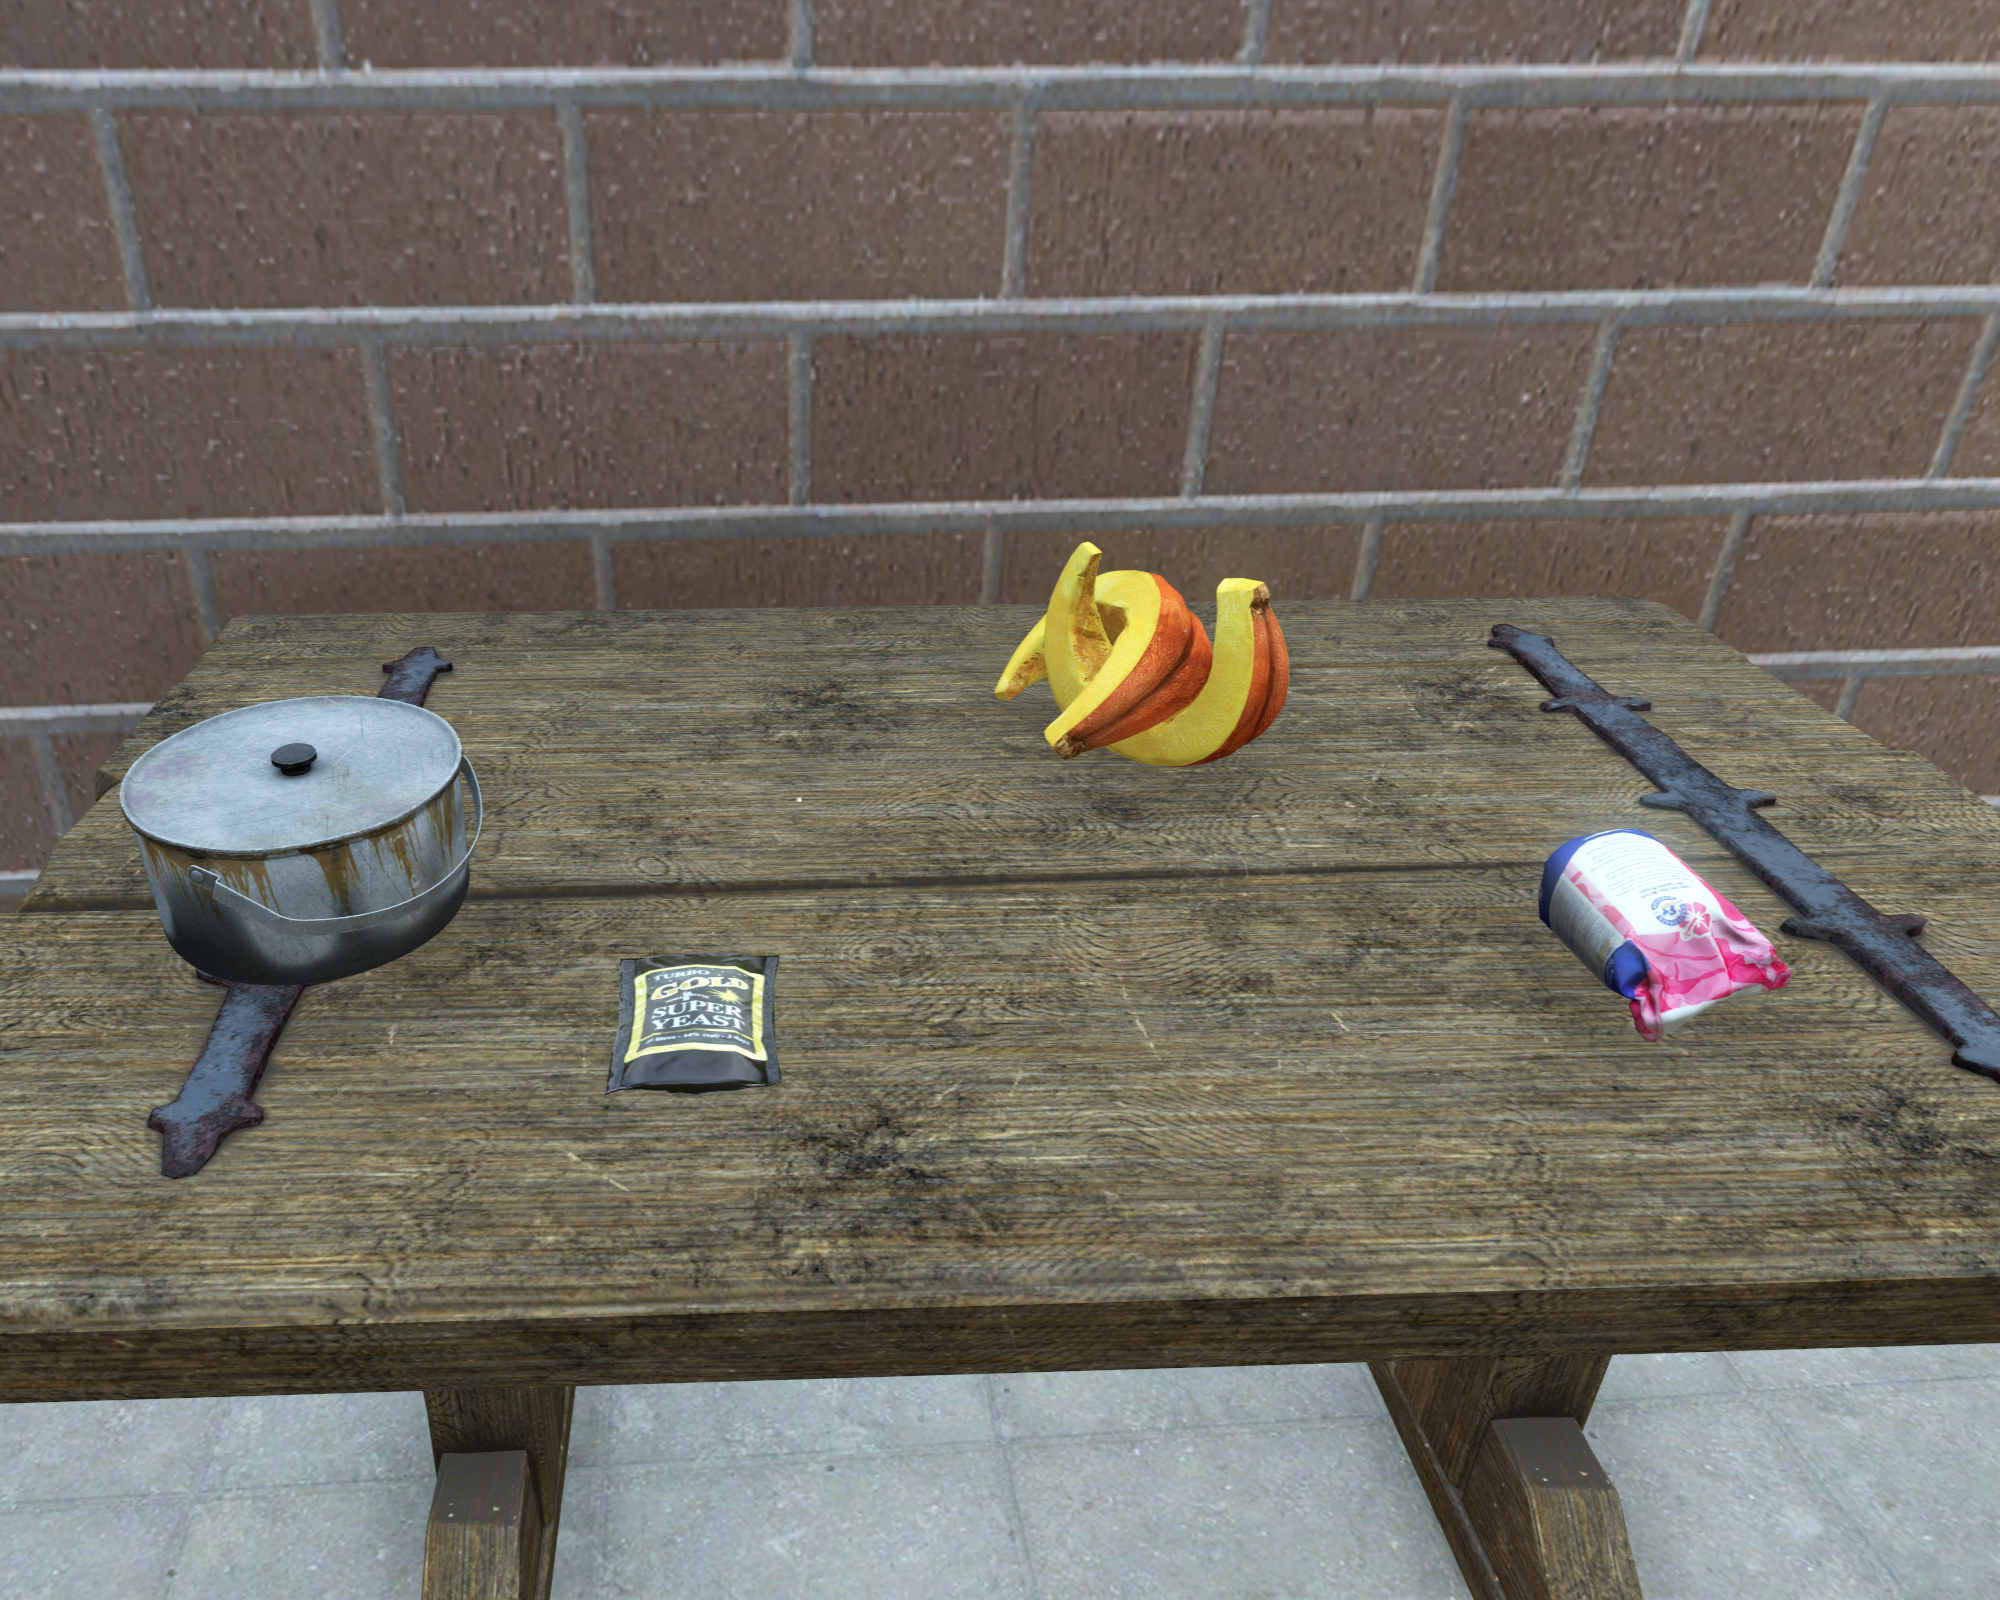
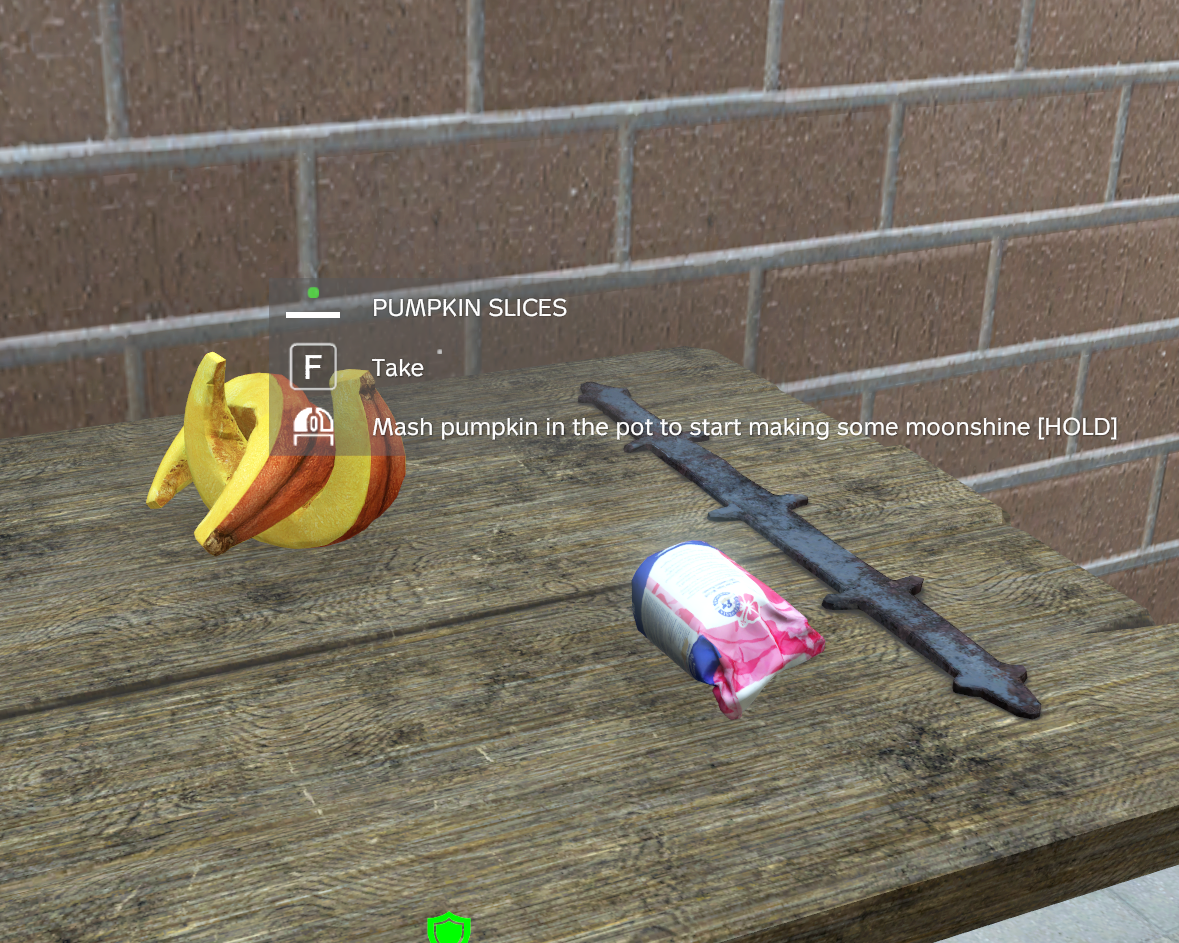
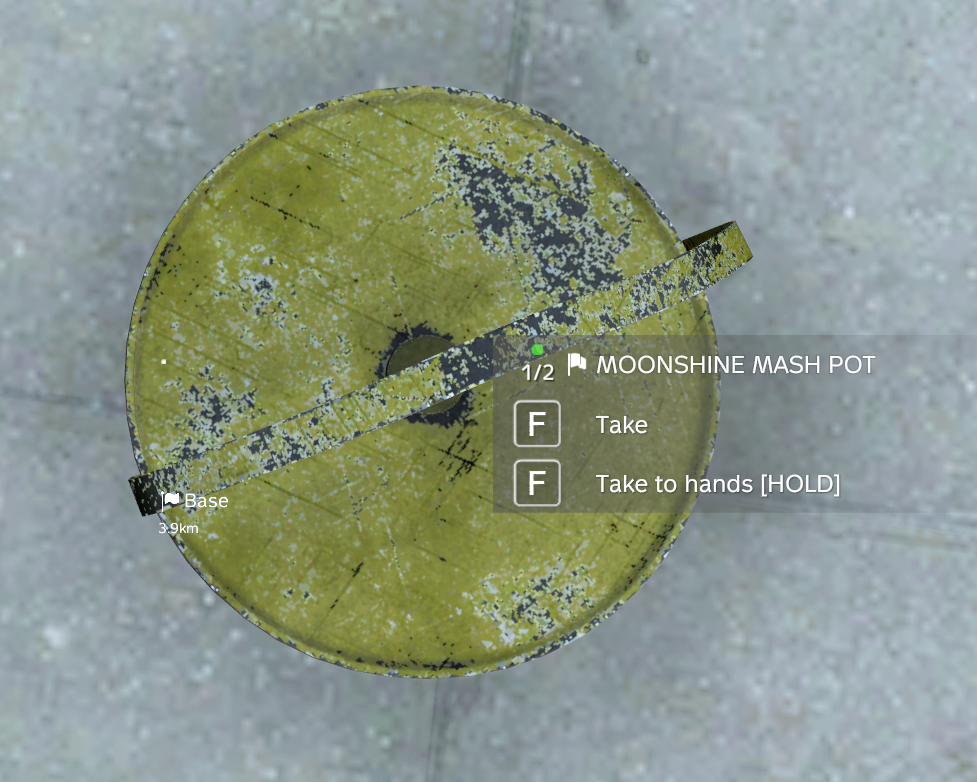
Step 4: Create the Mash
Combine a Cooking Pot with your chosen flavor ingredient.
Example: Cooking Pot + Pumpkin Slices = Pumpkin Mash Base
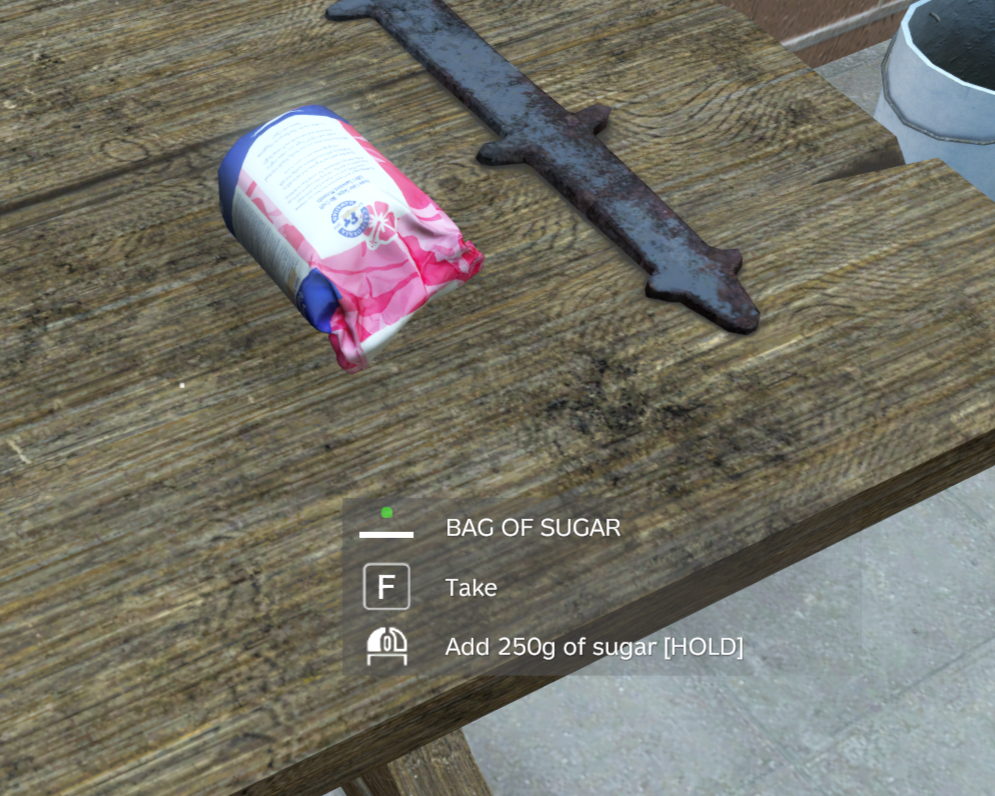
Step 5: Add Sugar
Combine Sugar with the mash mixture.
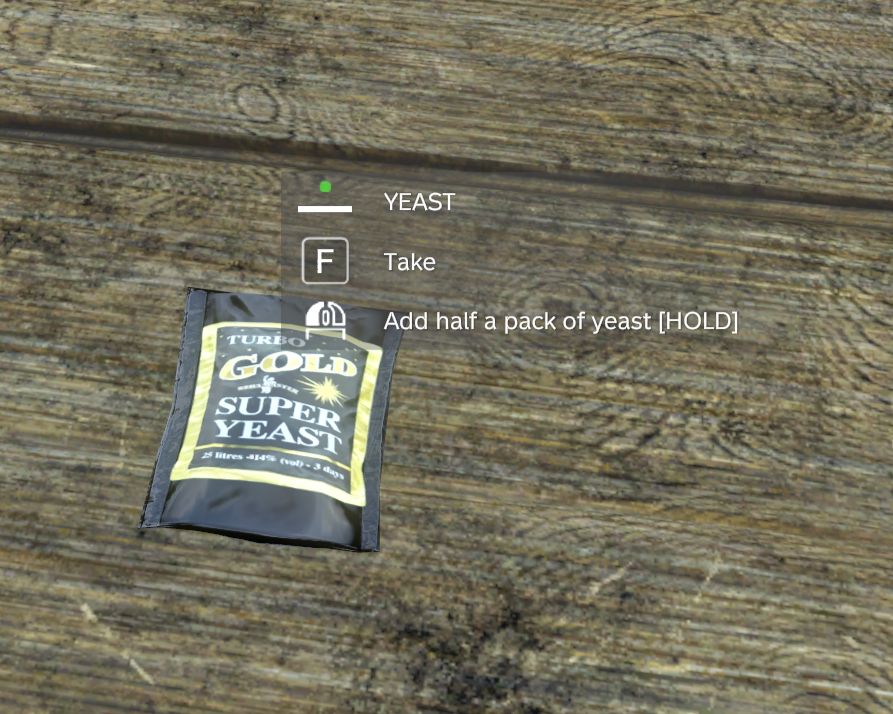
Step 6: Add Yeast
Combine Yeast with the mash mixture to complete the fermentation process.
Step 7: Repeat for a Second Pot
Create a second batch by repeating Steps 4-6.
You should now have 2 completed mash pots.
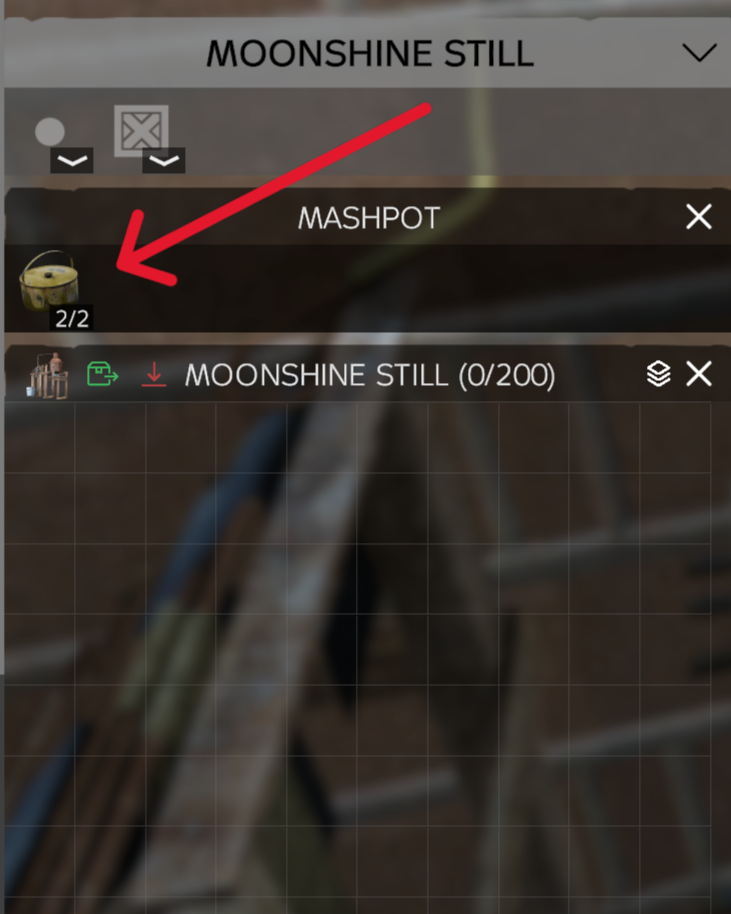
Step 8: Load the Still
Place both completed mash pots into the Moonshine Still.
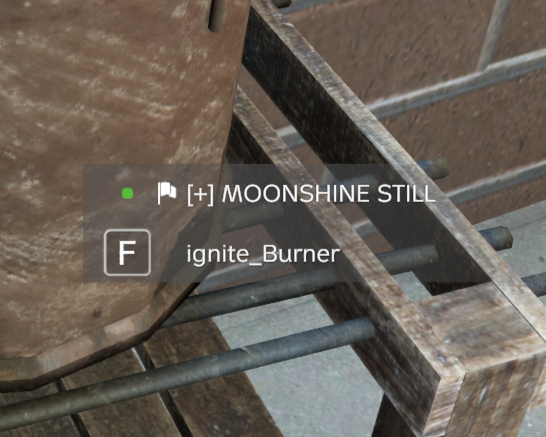
Step 9: Fire It Up
Ignite the still and allow it to process the mash.
Wait for the distillation process to finish.
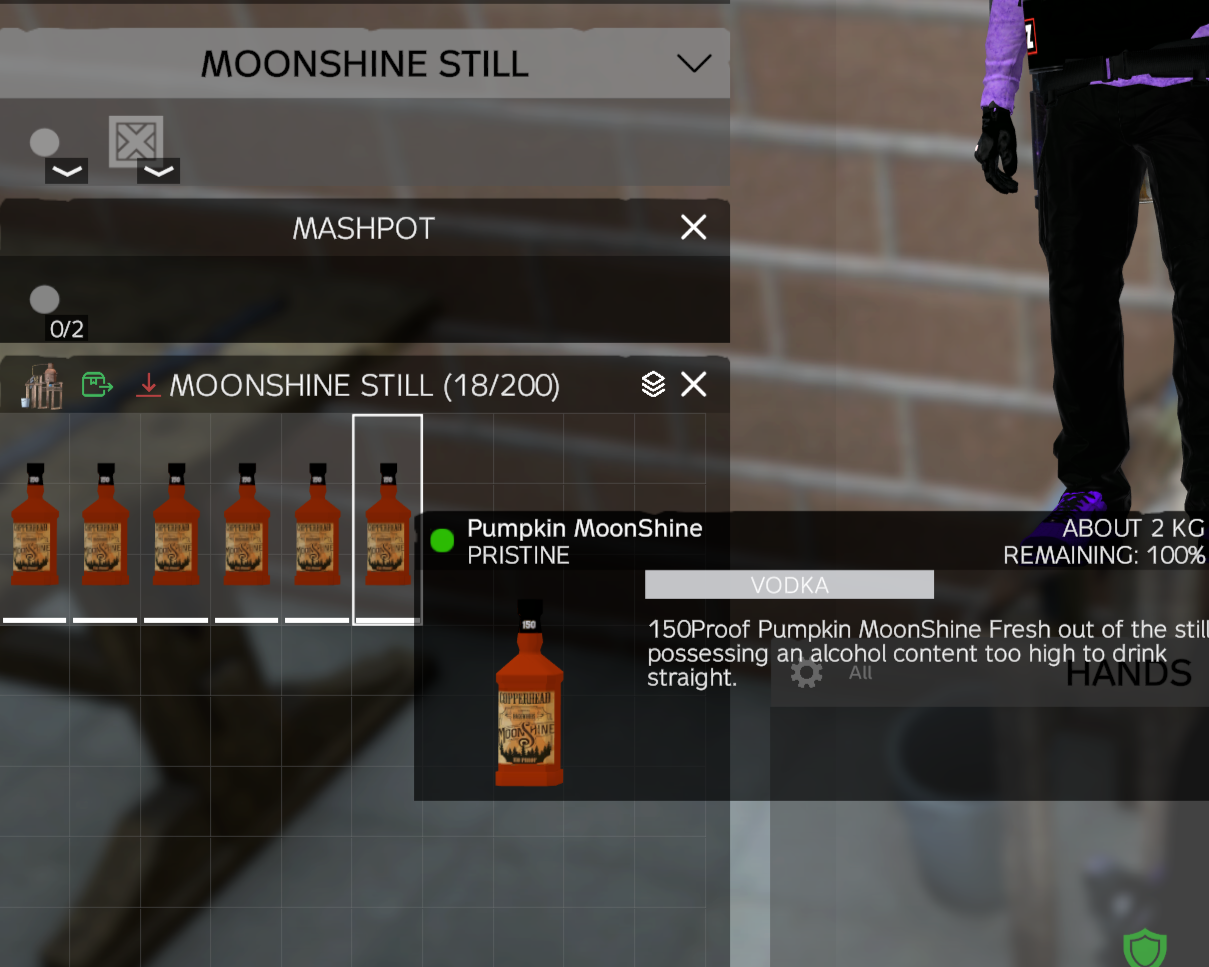
Step 10: Collect Your Moonshine
Once processing is complete, open the still and remove your freshly distilled moonshine bottles.
Enjoy your hard-earned shine or sell it for profit.
Moonshiner Tips
- Different flavor ingredients produce different moonshine varieties.
- Keep extra sugar and yeast on hand for larger production runs.
- Set up your operation in a secure location to avoid interruptions.
- The more batches you run, the more profitable your moonshining business becomes.
Happy Brewing from The Collapse!
Mining Mining Guide Mine ore and gems, smelt nuggets, craft ingots, cut gems, and make higher tier bars.
Mining Guide
The Collapse DayZ Servers
Use mining stations and mining pickaxes to turn raw ore and gems into usable materials.
Required Equipment
Mining Stations
These can be found around the map or purchased.
Required Attachments
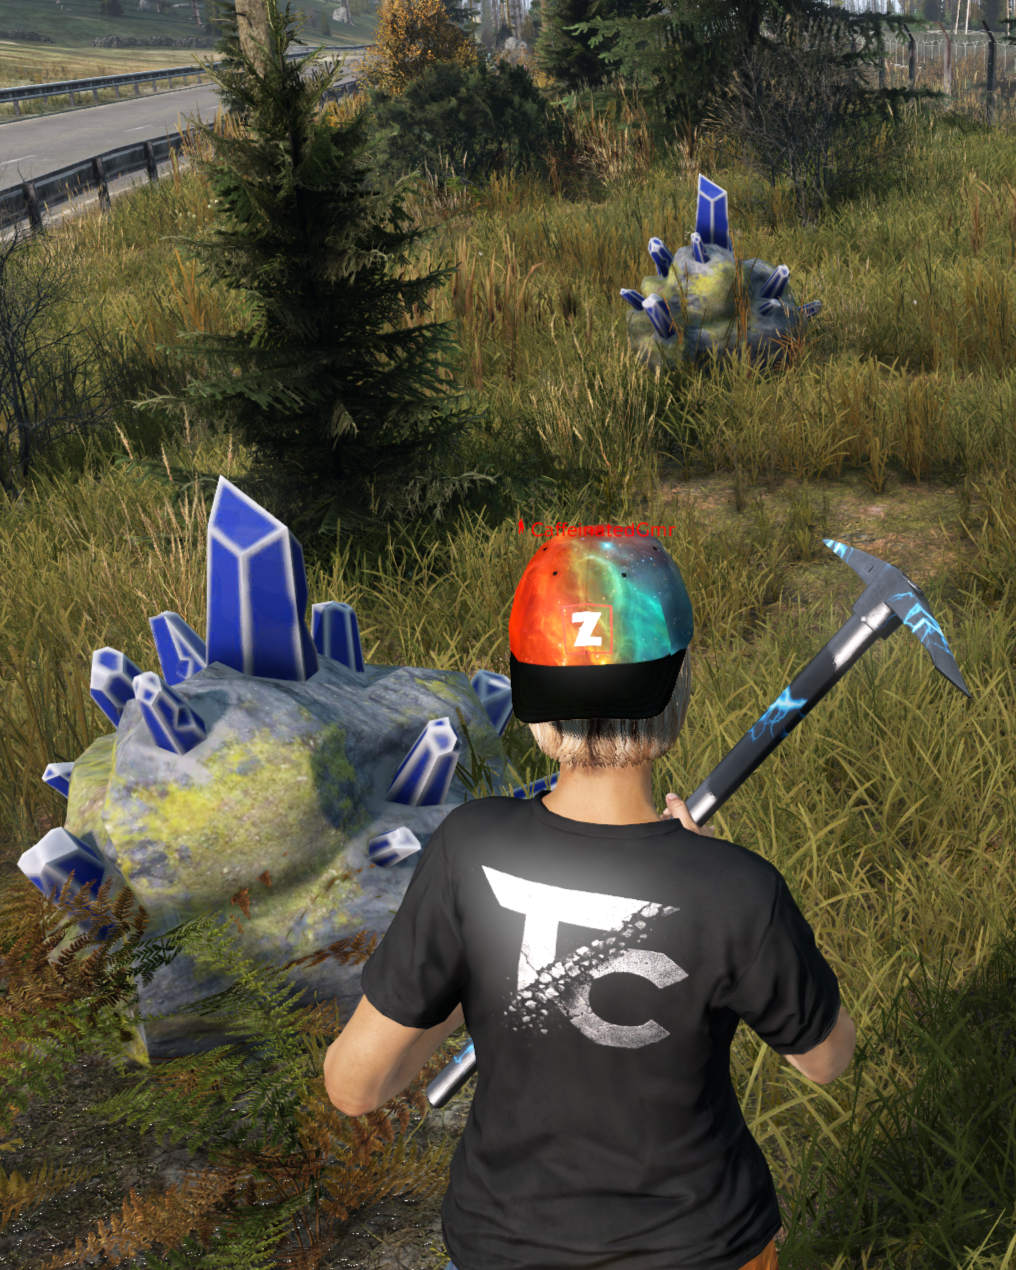
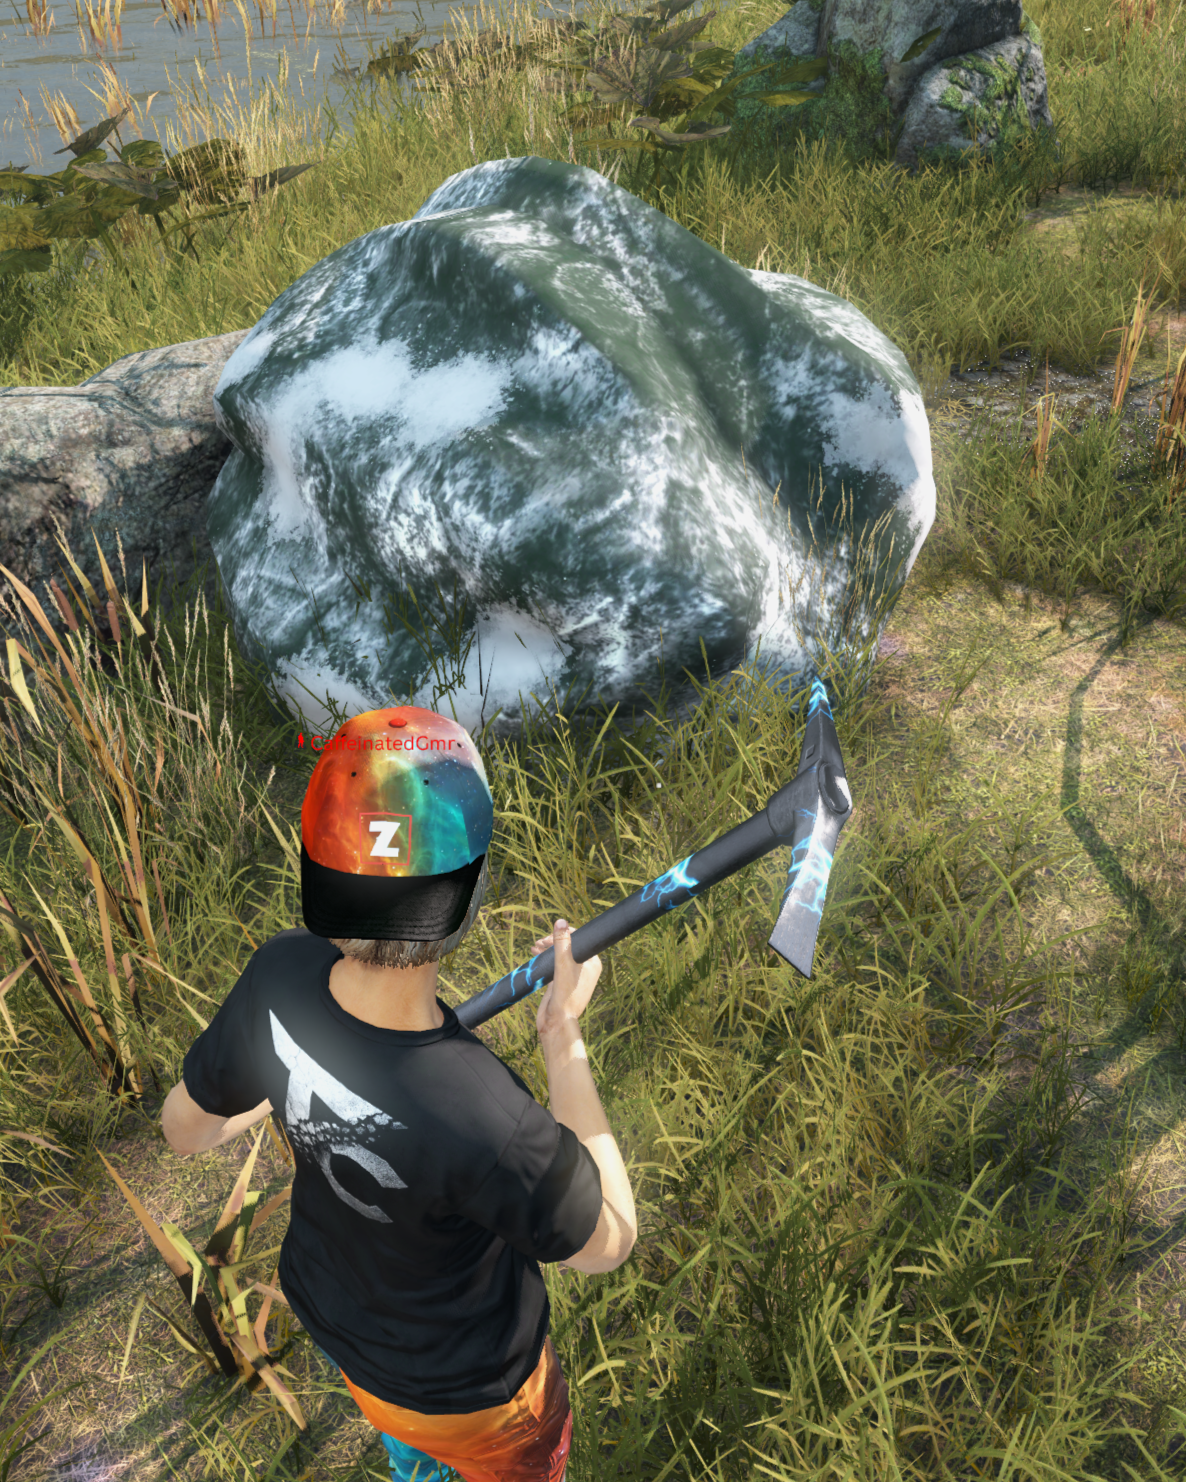
Step 1 - Mine Ore & Gems
Use Mining Pickaxes, not vanilla pickaxes, to collect:
- Ores
- Raw Gems
Iolite Gem Nodes do not spawn. Purchase Iolite Gems at Mining Trader instead. When spawned, the Iolite node causes issues with other mods.
Step 2 - Smelt Your Ore
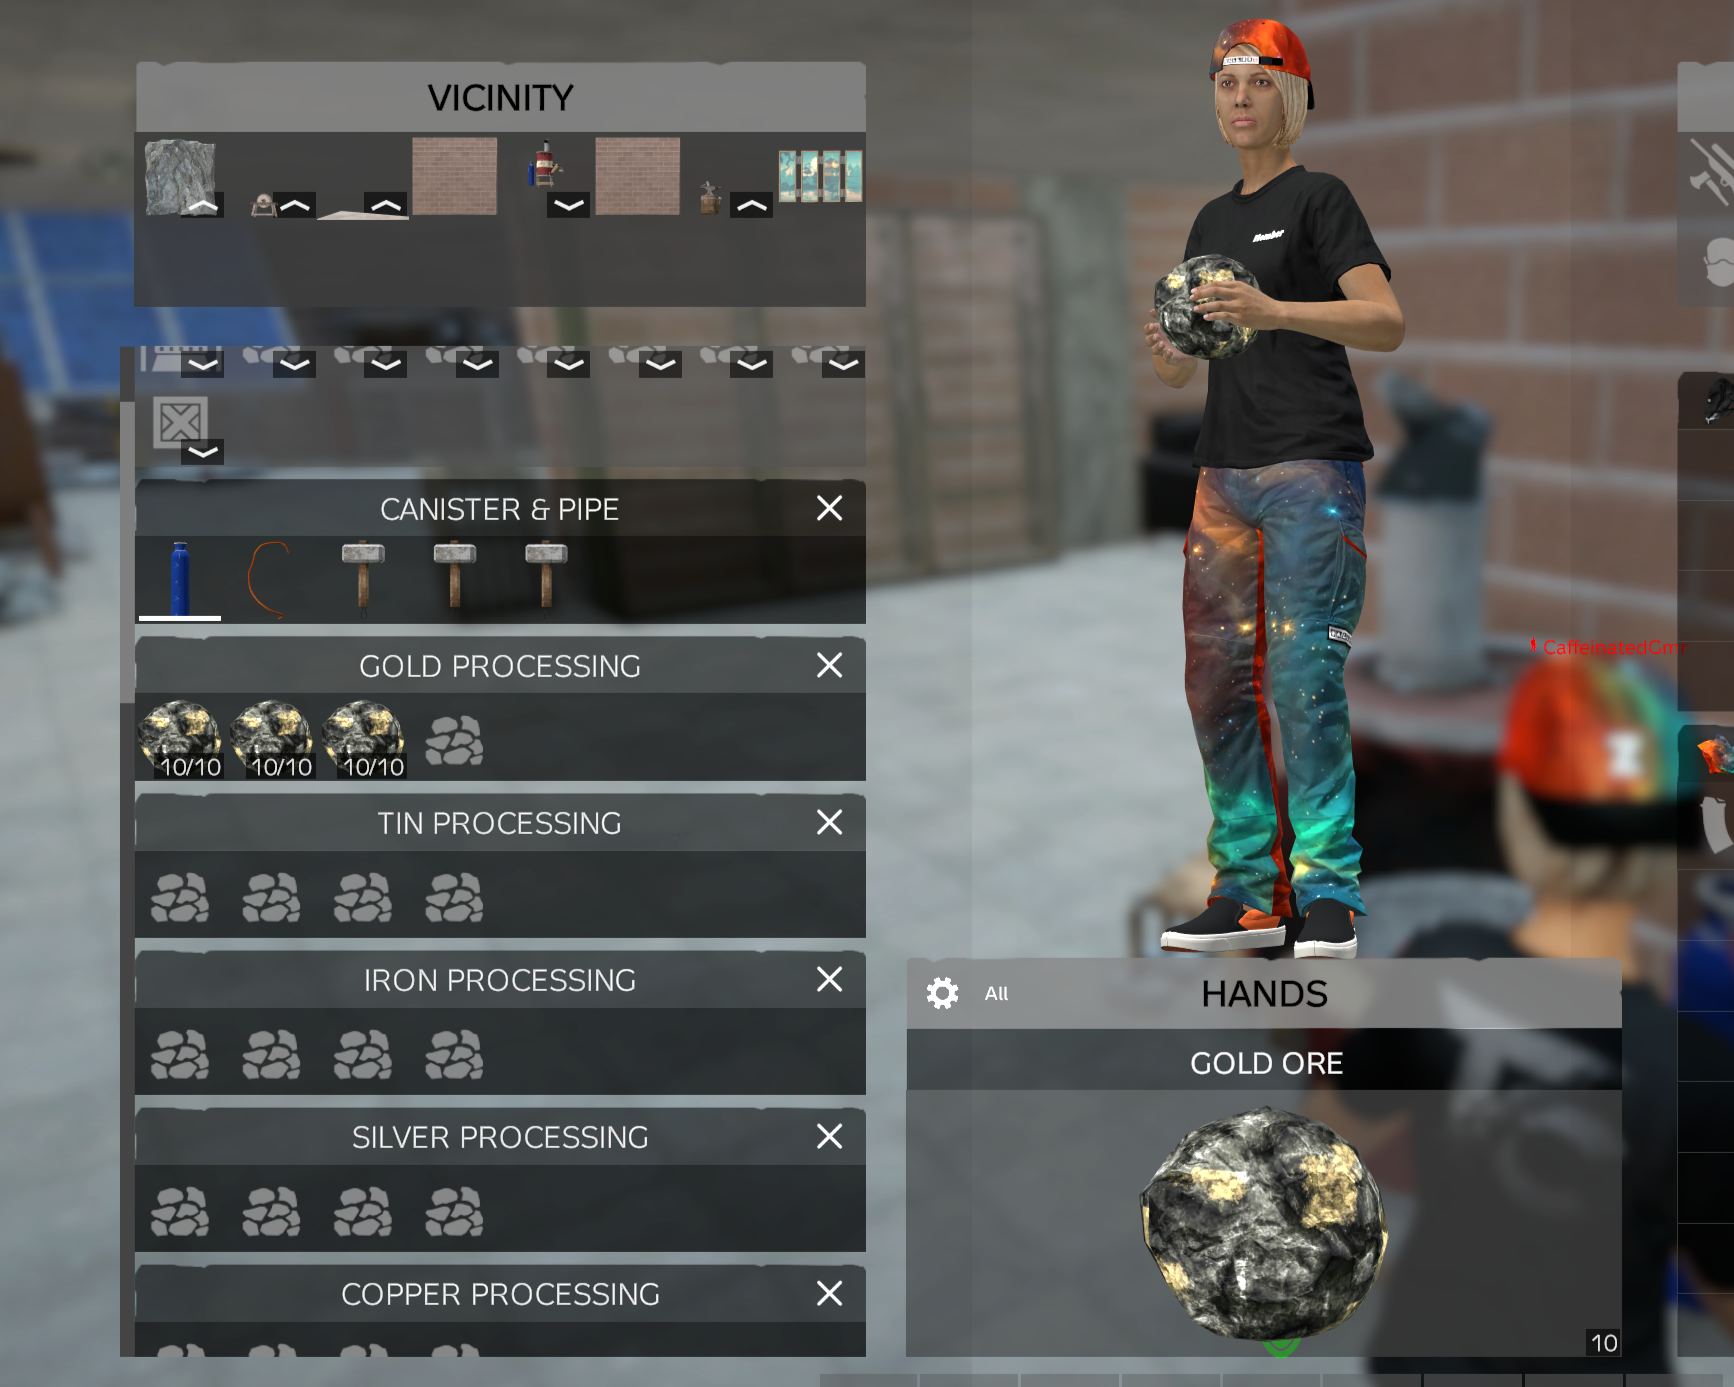
At the Smelting Furnace:
- Place ore into the furnace inventory.
- Turn the furnace on.
- Wait a few minutes.
- Your Ore Nuggets will appear in the attached crates.
Step 3 - Craft Ingots
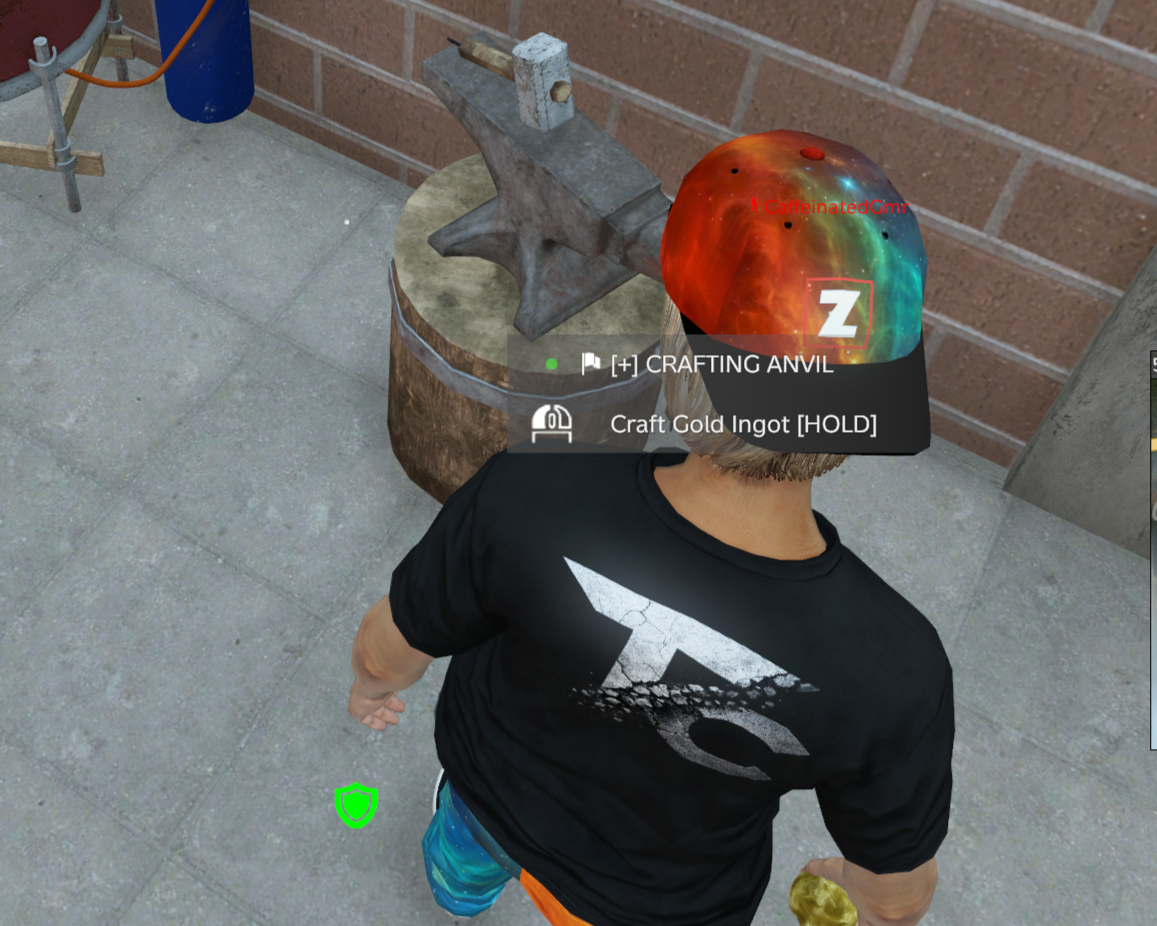
At the Crafting Anvil:
- Stand near the anvil while carrying Ore Nuggets.
- Use the crafting prompt.
- Your finished Metal Ingot will appear in the crate.
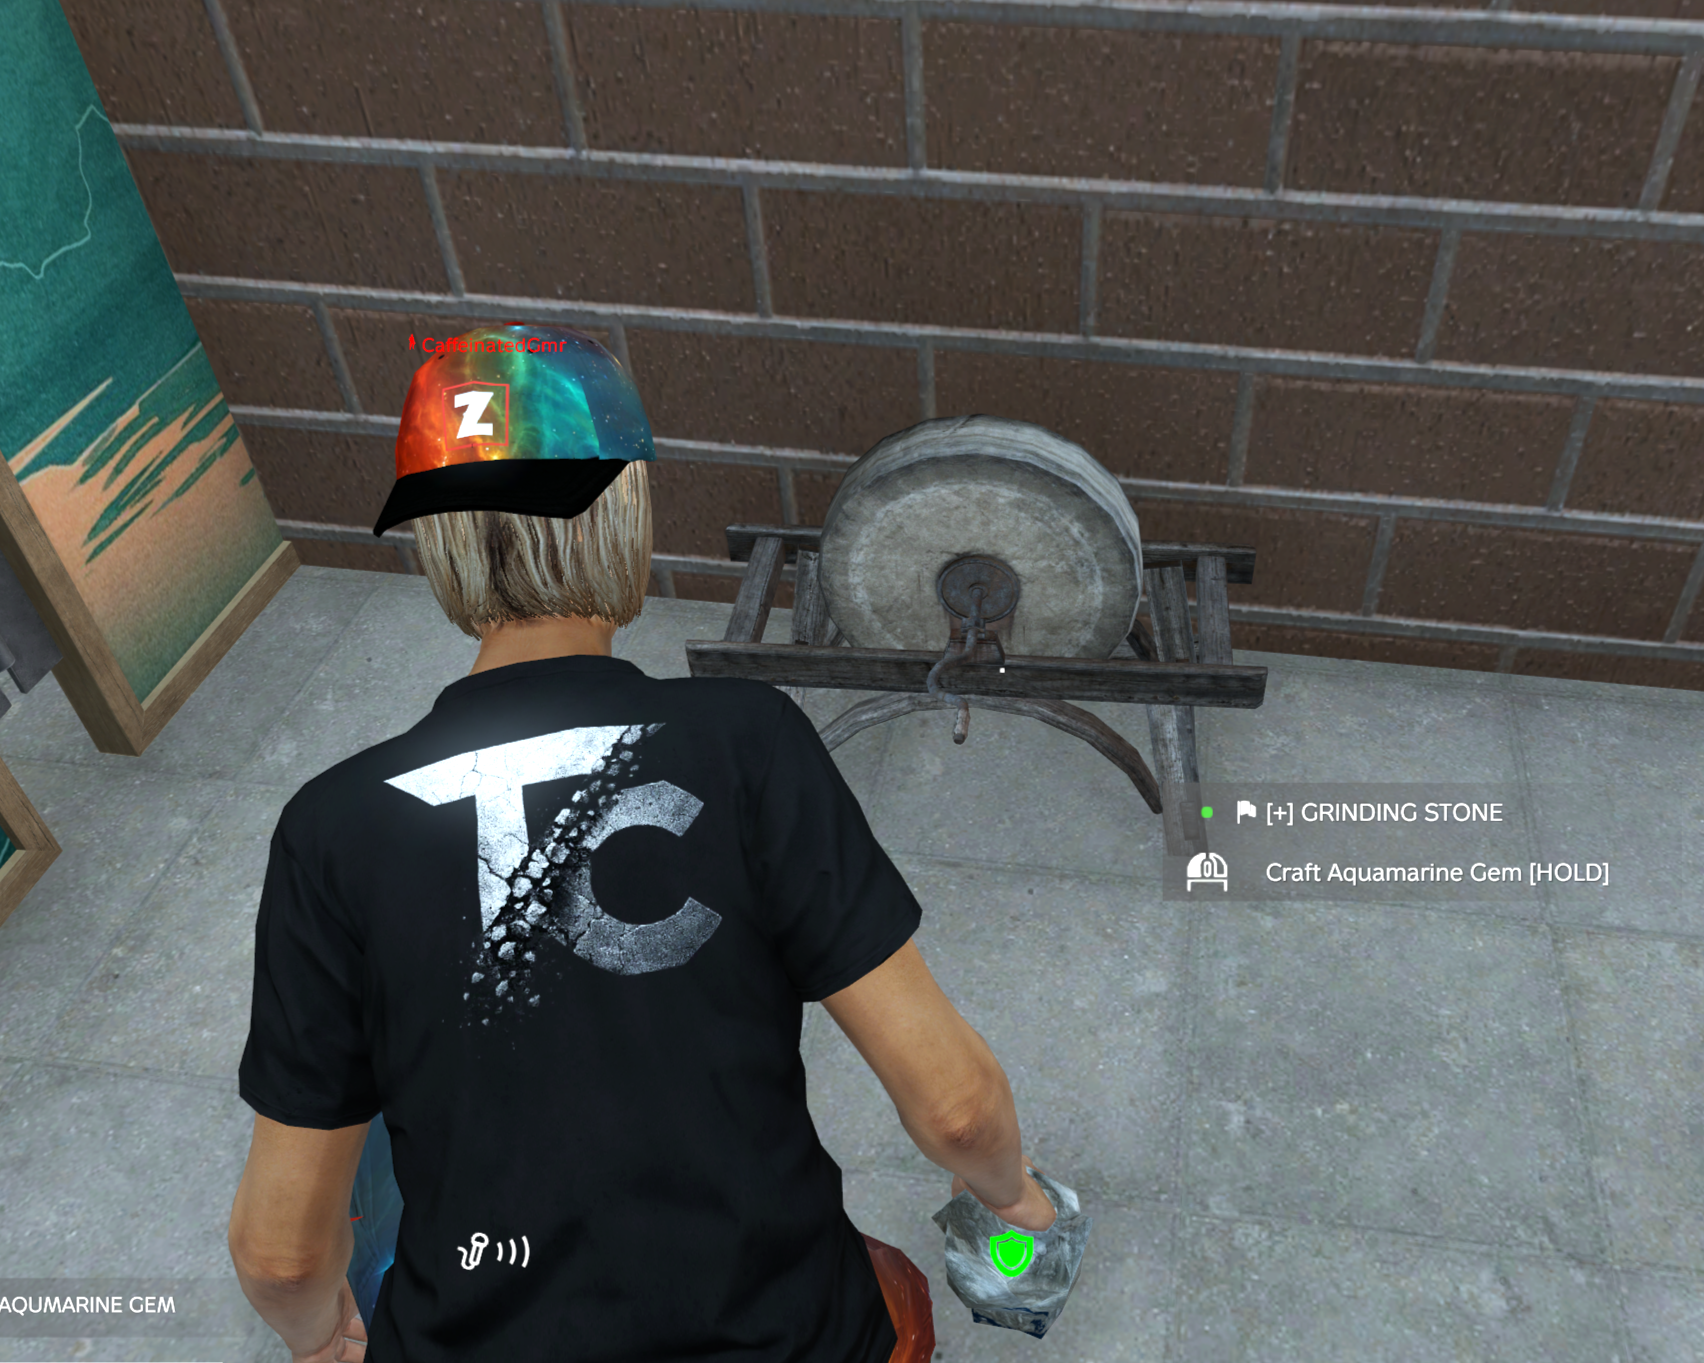
Step 4 - Cut Gems
At the Grinding Stone:
- Hold a Raw Gem in your hands.
- Use the crafting prompt.
- The finished gem will appear in the crate.
Step 5 - Higher Tiered Bars
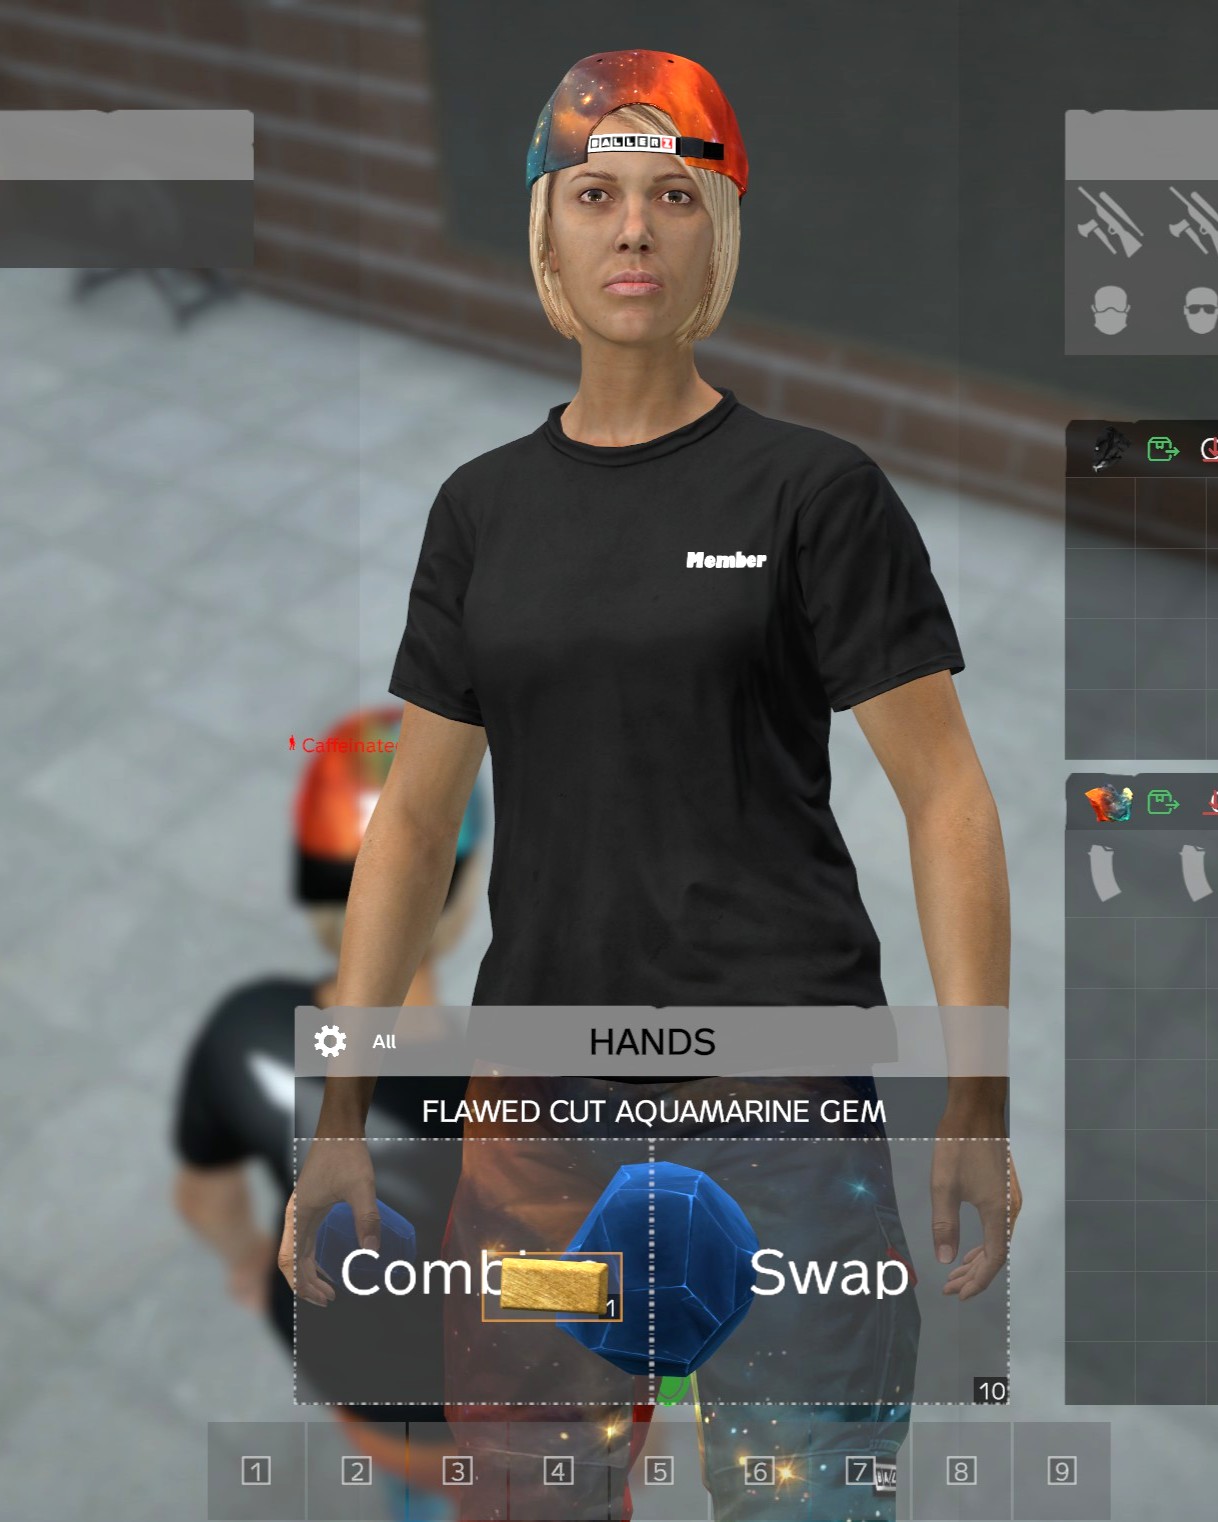
See the recipes listed below for the specific bar you want to craft.
In your hands, combine the ingredients to get the prompt to create the specific bar.
Mining Mining Recipes Craft station kits, bars, cut gems, fusion bars, and top-tier mining bars.
Basic Crafting
Normal Bars
Gems
Iolite Gem Nodes do not spawn. Buy Iolite Gems at Mining Trader, then cut them with a Grinding Stone like other gems.
Special Bars
Fusion Bars - Flawed
Fusion Bars - Standard
Fusion Bars - Perfect
Legendary / Mythic Bars
Exploration Diving Guide Walk underwater to explore shipwrecks, underwater bunkers, and submerged loot spots.
What It Does
Diving gear allows players to walk underwater.
It is good to use for shipwrecks and underwater bunkers.
Where To Get Gear
- Diving gear can be found while looting.
- Diving gear can also be bought at Advanced Trader.
Reference Video
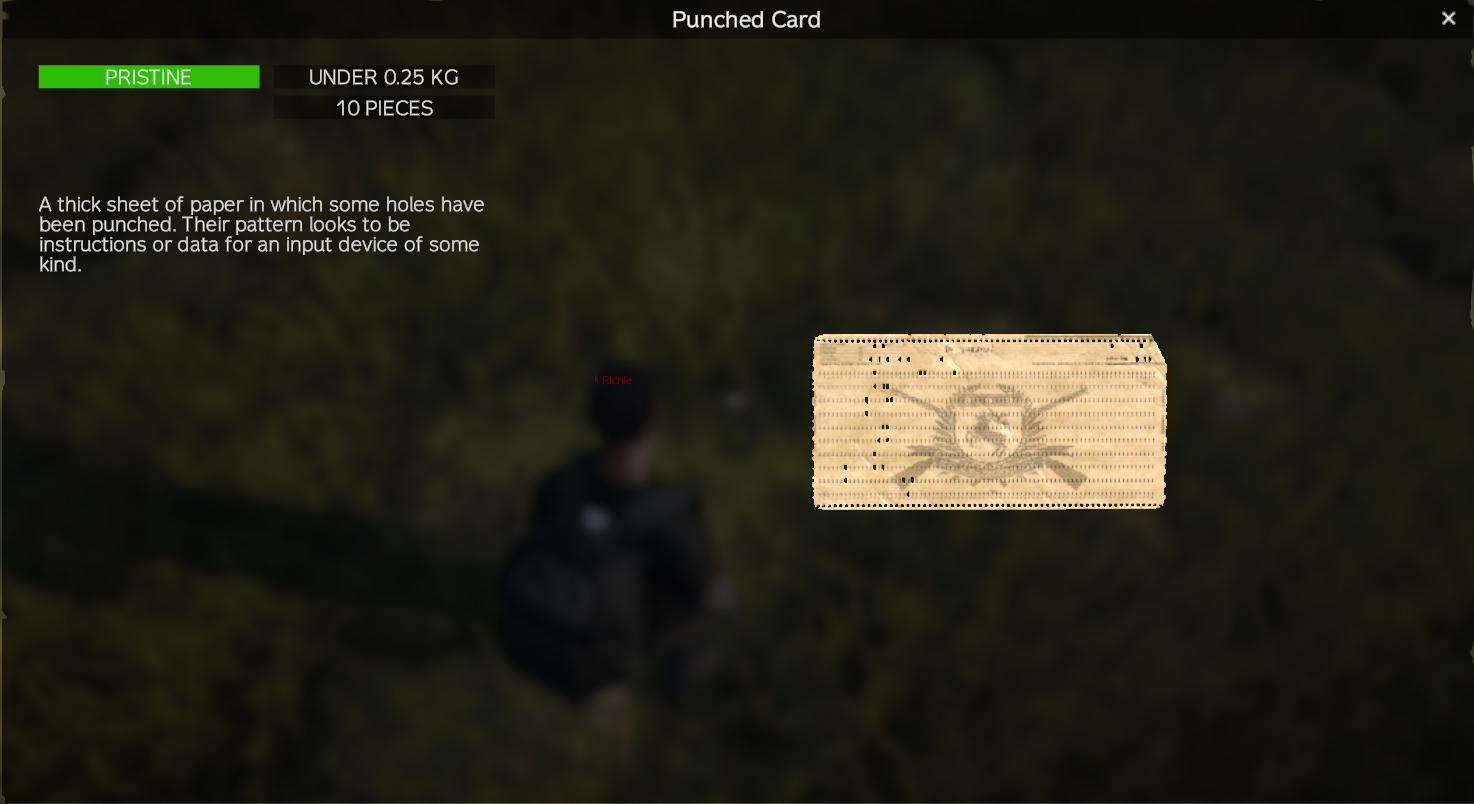
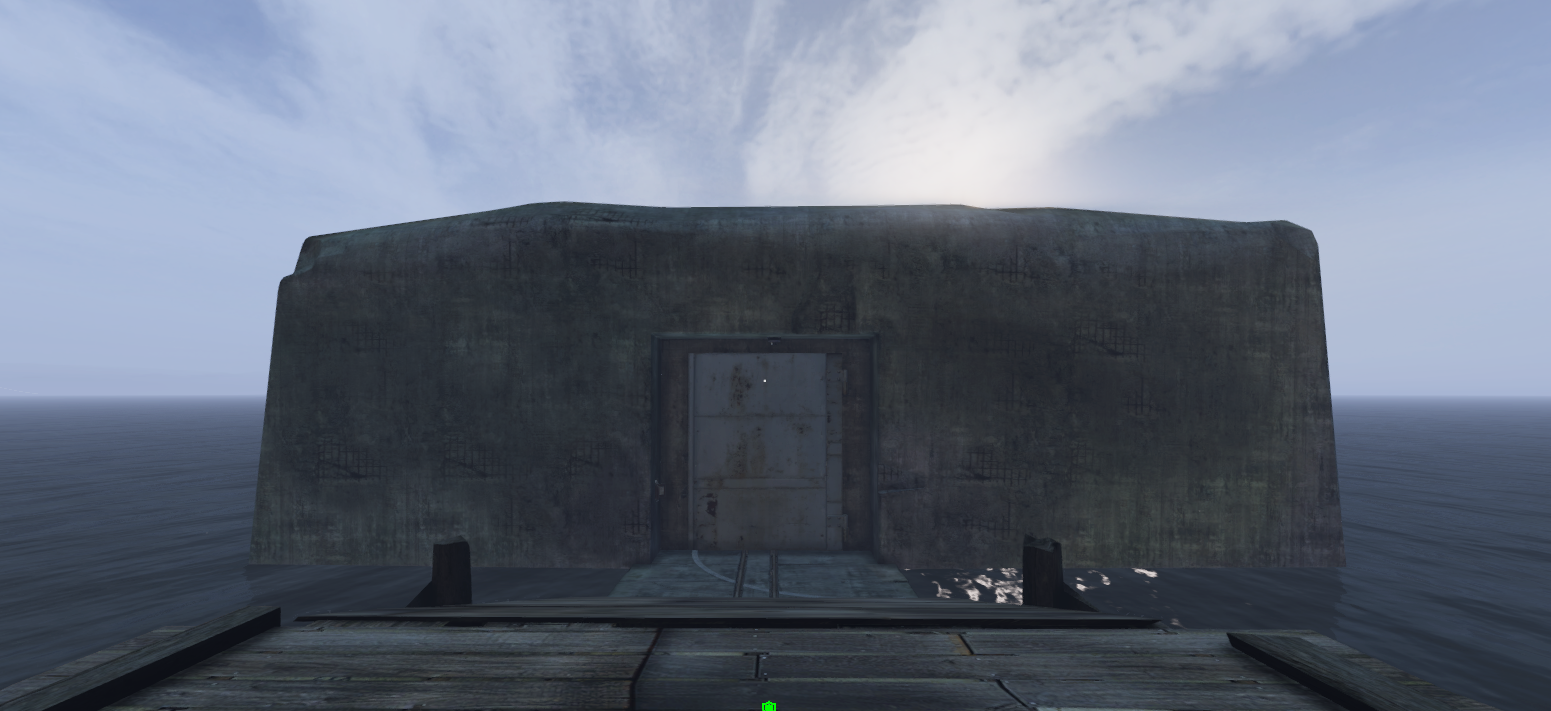
Exploration Underwater Bunker Enter with diving gear and a Punch Card, then use the teleport exit after looting.
Requirements
- Requires Diving Gear.
- Requires a Punch Card on entry.
- Use the teleport exit to leave.
No Log Out Zone
The Underwater Bunker is a no log out zone. If you log out inside, you will be moved out of the bunker and onto land when you return.
Loot
The bunker holds high tier loot, so arrive prepared and make sure you have a way back out before committing to the run.
Food CookZ Food Guide Grab supplies from Main Trader, follow the cooking reference, and use a Gas Stove.
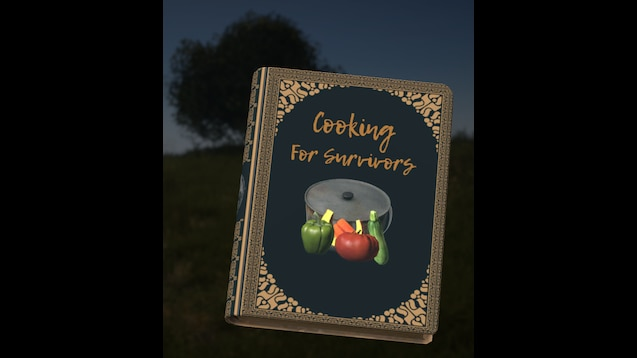
Become the Collapse Chef
Want to up your game and become the Collapse Chef?
- Head over to Main Trader and grab some supplies to make several different recipes.
Note
To my knowledge the recipes will only work if you use a Gas Stove, not a fireplace.
Fishing GebsFish Guide Freshwater and saltwater catches, plus where to sell fillets.
Where To Fish
Some fish are saltwater. Some fish are freshwater.
Here is where you can go to catch certain fish.
Freshwater
Anywhere thats NOT the ocean or on the beach
Saltwater
Anywhere in the ocean or on the beach
Selling Fillets
Fillets can be sold at Hunting Trader.
Keyed Crates Lootchest Guide Use found keys to open restart-based lootchests around the map.
Found Some Keys?
Found some keys? Great! You'll need those.
- You'll find 8 keys that are of use.
- The key name & description will tell you where to go look.
What's The Loot Like?
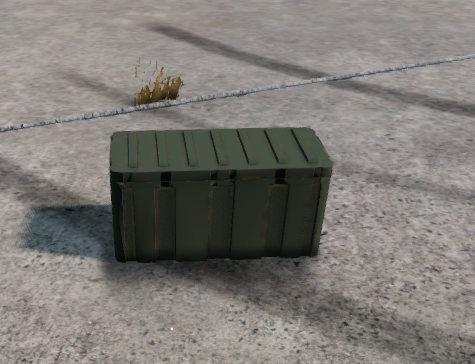
Each location is slightly different but for the most part you will get:
Key Drops
I heard zombies & monkeys drop keys.
Restart Rule
Lootchests spawn shortly after server restart and can only be opened once per restart.
Quick Tip
Try a crowbar or sledgehammer on a crate, it may work!
Keycards Extreme Zone Card The card has two possible uses, but the second use is not required to leave.
How It Works
- The Extreme Zone Card has two uses.
- The first use is at the door to enter.
- The second use is somewhere inside the zone.
- You do not have to use the card both times to leave.
Quick Note
If you only use the card at the door, you are not locked in. The extra use inside is optional.
Compensation Recording For Compensation Set up Medal, NVIDIA, SteelSeries, or AMD recording before big runs.
Why Record?
Use gameplay recording for trader runs, high-value sales, vehicle transfers, stash moves, or anything that may need proof for compensation.
If items, money, or vehicles are lost due to a server crash, restart issue, bug, desync, vehicle despawn, or another valid server issue, staff may need video proof.
Choose Your Recorder
Open the recorder you use below and follow that setup. Medal works for almost everyone, while NVIDIA, AMD, and SteelSeries depend on your hardware or installed software.
How To Use It
Before starting a trader run, make sure replay capture is enabled or manually start a recording. If something goes wrong, save the replay/recording right away.
Compensation Ticket Requirements
Your clip must clearly show:
Important
Compensation is not guaranteed without proof.
Screenshots may help, but video proof is strongly recommended.
Clips that are too short, blurry, heavily edited, missing context, or only show the aftermath may not be accepted.
No clear video proof = compensation may be denied.
Collectibles Pokemon Card books, booster packs, rewards, and where packs can show up.
Overview
Are you a Pokemon Guru?
Collect all 183 cards and receive a HUGE payout
- You find or buy a Pokemon Card Book to store your goodies and keep track of whats missing!
Booster Packs
- There are 3 different booster packs
- Each offer packs of 1,3, and 5
What's the reward?
Complete the full Pokemon card set and you will receive:
- 500 Slot Collapse Backpack (you pick)
- x4 50rd Collapse AS50 mags
- 10mil rubles
- x2000 ammo (you pick)
Where They Spawn
Booster packs spawn on the ground, but can also be found on zombies or at events like Airdrops and Keyrooms
Turn-ins NomNom Collectibles Sell-only sets, display kits, Gacha Cubes, and collectible turn-ins.
Overview
NomNom's Collectibles brings a TON of items to your PvE experience!
NOTE: Some collectible sets can be turned in via the menu. Check your keybinds for NomNom
The rest are for sell only at Collectibles Trader
Cards
- Collect all Yugioh cards for a sweet reward (TBD)
- Collect all Magic cards for a even sweeter reward (TBD)
Other Items
- You can find display kits for all collectibles (or buy them at Collectibles Trader)
- Display kits can be placed in your base to showoff those shiny collectibles
Where do I find these items?
- Collectibles spawn quite literally everywhere. Go explore and see for yourself!
Where do I sell these items?
- Collectibles Trader only or to other players via hand-to-hand or p2p trader
Gacha Cubes
You can also find Gacha Cubes that can be opened up and inside you'll find rare collectibles
Danger Zones Mob-Protected Traders Advanced, Collectibles, Drug, and Black Market exits use teleport sheds.
Locations
Collectibles / Advanced / Drug / Black Market
Teleport Exit
All of these DO NOT have an exit, other than a teleport exit.
By all means run back out the way you came, but if it were me.... I'm taking that damn teleport!!!
What To Look For
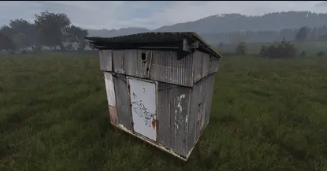
See the image below, that's the shed you are looking for to get your ass outta there! (This is just a template, not the actual location)
Red Trader Protocol Collapse Protocol How red trader trigger spawns scale around solo players, groups, and Collapse guns.
What It Is
Collapse Protocol is our in-house mob spawner system. It is only active at red traders.
Active Locations
- Drug Trader
- Advanced Trader
- Collectibles Trader
- Black Market
How Spawns Roll
When you enter a trigger point, the system rolls spawns based off of you.
That means if you go in solo, it is meant to stay manageable. You are only dealing with the mobs that were rolled for you, not everyone else's on top of yours.
Groups Hit Harder
If you go in with a group, every player who walks through the trigger will roll their own spawns.
So, for example, a group of 5 can naturally create a much heavier fight because each person is bringing their own spawn roll into the area.
The Twist
If you have a Collapse gun anywhere on you, you are automatically bumped out of the regular spawn pool and placed into a separate spawn pool designed around Collapse guns.
Weapon Stats Collapse Weapon Damage Damage values for Collapse weapons.
Weapon Damage
Mob Health Mob Health Tiered health values for mutants, mummies, bears, wolves, and more.
Tier 1
Health Range - 50/1000
Mutants
Monkeys / Gorillas
Bears
Tier 2
Health Range - 1500/3000
Mutants
Mummies
Bears
Wolves
Tier 3
Health Range - 4500/30000
Mutants
Mummies
Bears
Boss Bears
No wiki results found. Try a different search.